NodeMCU ESP8266 with 0.96 Inch OLED Module Development Board
Integrated 0.96′ OLED
Type-C
Compatible with Arduino
Compatible with N0deMClJ(Lua for ESP8266)
Input Power SV
Compatible for Arduino
Compatible with NodeMClJ(Lua for ESP8266)
1,000.00৳ Original price was: 1,000.00৳ .630.00৳ Current price is: 630.00৳ .
NodeMCU ESP8266 with 0.96 Inch OLED Module Development Board
Overview:
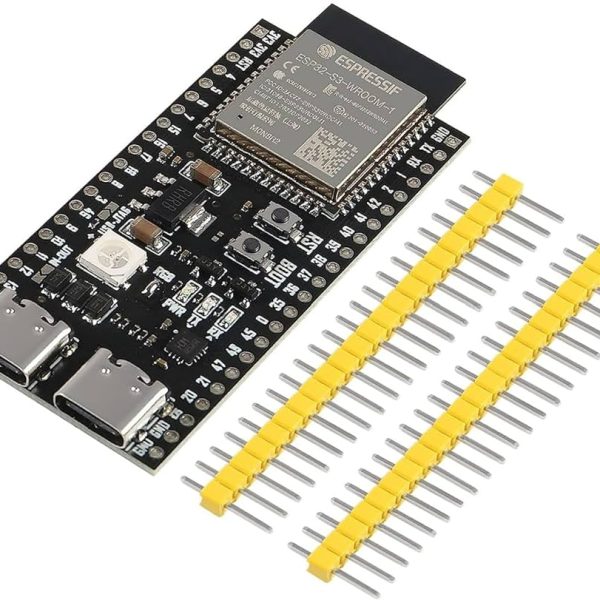
The NodeMCU ESP8266 with 0.96 Inch OLED Module Development Board combines the power of the ESP8266 microcontroller with a crisp 0.96-inch OLED display, offering a compact and versatile platform for IoT development, data visualization, and DIY electronics projects. This development board is designed for ease of use and compatibility with the Arduino IDE, making it accessible to both beginners and experienced developers.
Key Features:
ESP8266 Microcontroller: Leveraging the capabilities of the ESP8266 for seamless wireless communication and IoT applications.
0.96 Inch OLED Display: The integrated OLED module provides a clear and bright display for presenting real-time data, sensor readings, and other visual information.
Built-in Wi-Fi Connectivity: Connect to Wi-Fi networks effortlessly, enabling your projects to access and transmit data over the internet.
Compact Development Board: The NodeMCU form factor ensures easy integration into projects, making it suitable for prototyping and DIY applications.
Arduino IDE Compatibility: Program the board using the Arduino IDE, providing a familiar and user-friendly environment for coding and development.
GPIO Pins: Multiple configurable GPIO pins for sensor interfacing and project customization
Dimensions: Compact and suitable for prototyping
Applications:
IoT Prototyping
Home Automation
Sensor Networks
Weather Stations
Smart Wearables
Educational Projects
Package Includes:
NodeMCU ESP8266 Development Board with 0.96 Inch OLED Module
How to Use the NodeMCU ESP8266 with 0.96 Inch OLED Module:
Step 1: Connect Power
Connect the NodeMCU development board to a power source using the provided micro USB cable.
Step 2: Program the Board
Write your program using the Arduino IDE and upload it to the NodeMCU, configuring the GPIO pins as needed for your project.
Step 3: Display Data
Utilize the 0.96-inch OLED display to showcase sensor readings, IoT data, or any visual information relevant to your project.
Step 4: Connect to Wi-Fi
Leverage the built-in Wi-Fi connectivity to enable your NodeMCU to communicate with other devices or send data to the cloud.
Step 5: Integrate into Project
Once your program is tested and functioning correctly, integrate the NodeMCU ESP8266 with 0.96 Inch OLED Module into your IoT or electronics project.
Elevate your IoT projects with the NodeMCU ESP8266 Development Board featuring a 0.96 Inch OLED Module. Order now and bring your wireless innovations to life.


Reviews
Clear filtersThere are no reviews yet.